
Hello everyone!
I’m so glad to welcome my friend Leslie today from Brookhollow Lane! I have admired her Etsy shop and her creative work for some time, and I have bought several things from here over the years, such as this “believe” heart and my favorite Christmas ornaments.


I particularly love her shadowbox ornaments, they’re so vintage-y and sparkle-y, I have to restrain myself from buying all of them!!! Fortunately for me (and my pocketbook), Leslie agreed to share a tutorial for you all so that we can make our own!! Isn’t that nice?
Of course, if you aren’t the crafty type or don’t want to take time to make one, you can always buy one directly from Leslie at her Etsy shop Brookhollow Lane. But in the meantime, let’s make a shadowbox ornament!
Take it away, Leslie!

Hi!
My name is Leslie and I’m from Brookhollow Lane. I’m so excited and honored that Angela asked me to do a how to on my shadowbox ornaments. I’ve been making these for a few years and love doing different scenes and holidays in them. I love using vintage cards and images to create these. I think a complete image works best (not just part of a body or scene). You could use any type of image that you like. I also save those little wood Brie cheese boxes for these. Yes, we eat a lot of Brie over here, but you could use any type of small shallow card board or even metal box, round or square. As long as you can punch a hole for the hanger you’re good to go. Anybody can make these, its just lots of little steps of glueing and cutting and glittering.
Here we go:
Step 1: Gather Supplies

You will need:
-
a small, shallow container such as one from Brie cheese or the lid from a round craft box
-
small paintbrushes (at least 2)
-
vintage music or image of music (for the back of the ornament)
-
deckle-edge scissors (optional)
-
one length of grosgrain ribbon about the same width as the outside side wall of the box and long enough to go all the way around
-
one length of trim (I have pom-pom trim here) long enough to go around the box
-
a small bit of ribbon or string to make the hanger (I’m using narrow grosgrain ribbon here)
-
cotton swabs (for spreading glue)
-
scrapbooking paper (not pictured, for decorating inside the box)
-
Pop Dots (for adding dimension in the shadowbox)
-
Valentine images (more on that below)
-
hot glue (I prefer low temp for extra safety)
-
hot glue gun (use the right gun for the type of glue you purchase)
-
baubles to embellish with—for this ornament I used a mini craft bird and tiny heart ornaments from a garland
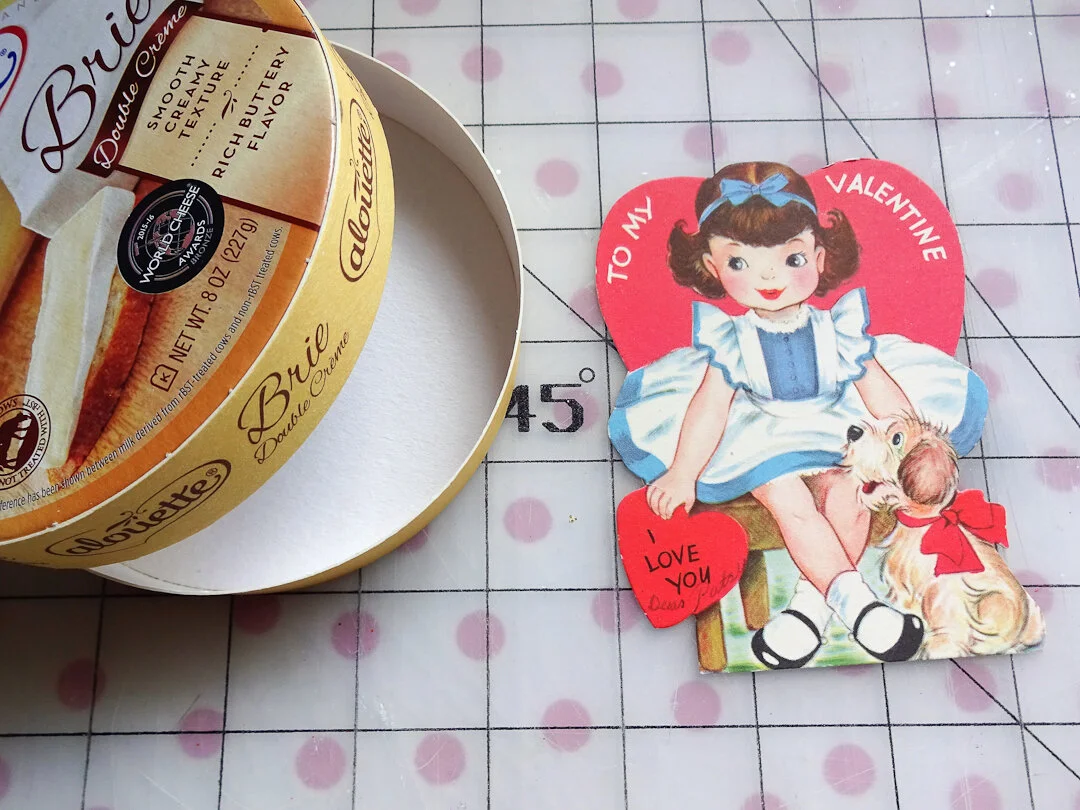
For the shadowbox container, you need a shallow cardboard, wood or metal container. It can be round, square, or any other shape. I used a clean, empty Brie cheese container.
You will also need images for inside the shadowbox. Here I used a vintage Valentine’s Day card (shared below), but you can also use a card you have on hand or purchase a vintage reprint. Another option is to find an image with a stock library such as The Graphics Fairy. A couple of great free collections are 9 Retro Valentines with Animals and 12 Retro Valentines with Children.
Step 2: Prepare Box

Use the craft paint and paintbrush to paint any parts of box with ads or stuff you don’t want to see. I painted 2 coats of red.
Step 3: Decorate the Back


Print out your back side image and trace around it. I used deckle-edge scissors and cut the vintage music slightly smaller so you can see the painted edge. I added a little heart from another valentine. Mod Podge the back to stick it down, let dry, and Mod Podge over the whole back to seal everything in. Use another paintbrush for this. Let dry.
Step 4: Decorate the Sides
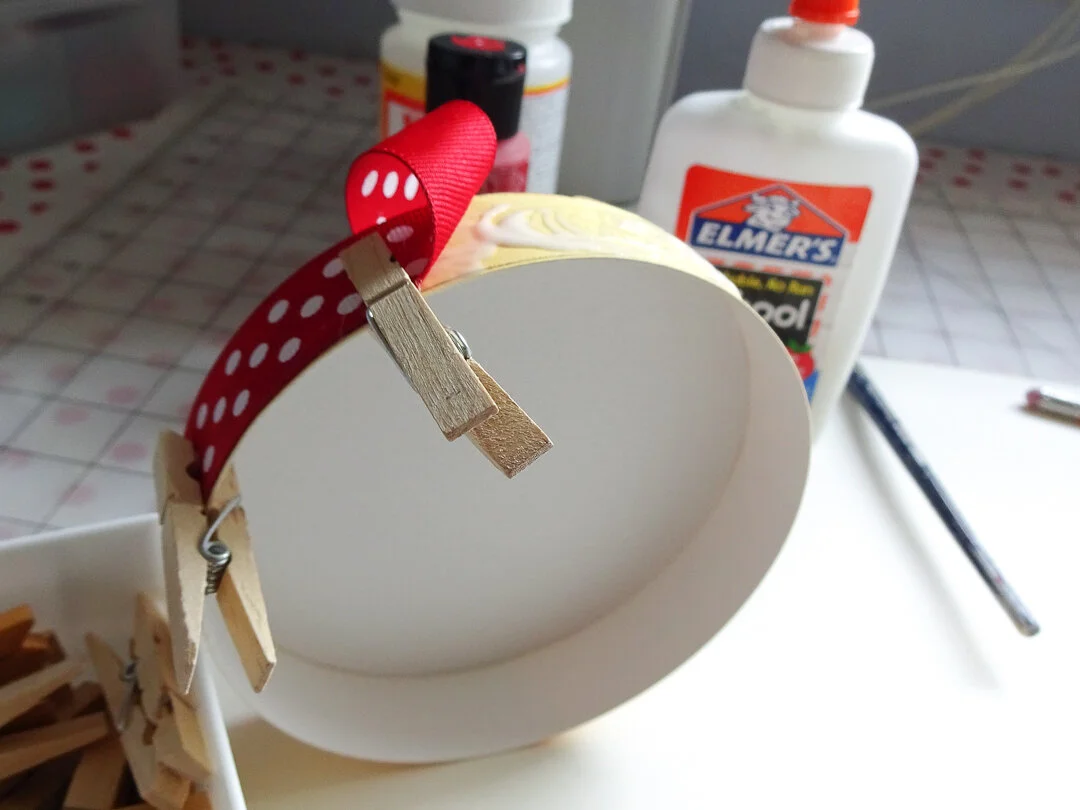
Glue wide ribbon to sides using the white glue. I use mini clothes pins to hold while it dries. I’ve found that some ribbon won’t stay if you use hot glue, but you can test it if you wish.
Step 5: Decorate the Front Edge
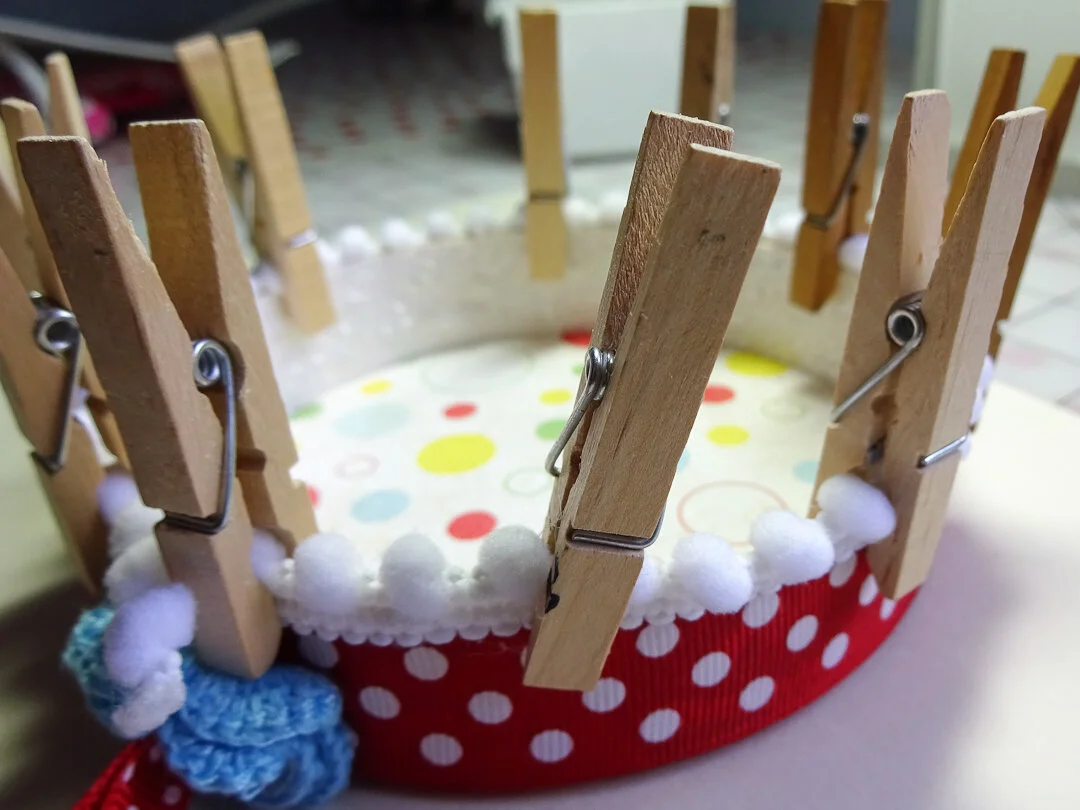
I added white mini pom pom trim to finish off front edge with white glue. You don’t have to do this step if you don’t want to. Hold it in place with more mini clothespins while it dries.
Step 6: Prep Box Inside

Trace your scrapbook paper and cut out with scissors to fit inside of shadowbox. Glue down with white glue and let dry. I use a cotton swab to spread the glue completely on back of paper.
Once the paper is in, spread glue on the inside wall of the container and apply glitter. Let dry.
Step 7: Make Ribbon Hanger

Use a hole punch to make small hole for ribbon hanger on top of box. Use small piece of ribbon and tie knot or glue ends to hold inside box. Let dry.

Step 8: Prepare Image
Whew, you’re almost done. Let’s prepare your image. First size and print it out on card stock to fit into the box.
If you you are making a Valentine’s Day ornament and haven’t already got a Valentine, you can use mine. Just right click the image here and choose “save.”
Once you have your images printed out, use glitter glue to add some sparkle to the valentine.
Let dry.

Step 9: Cut and Mount Image

Carefully cut out the image with scissors. Then use Pop Dots to stick it on the background. This creates a 3-D effect. You can even double up to make it stick out further.

Step 10: Embellish

Finally, add any small embellishments to inside or top of box. I used hot glue to add a miniature craft bird and red hearts. Here’s where you can get really creative. Have fun with it.

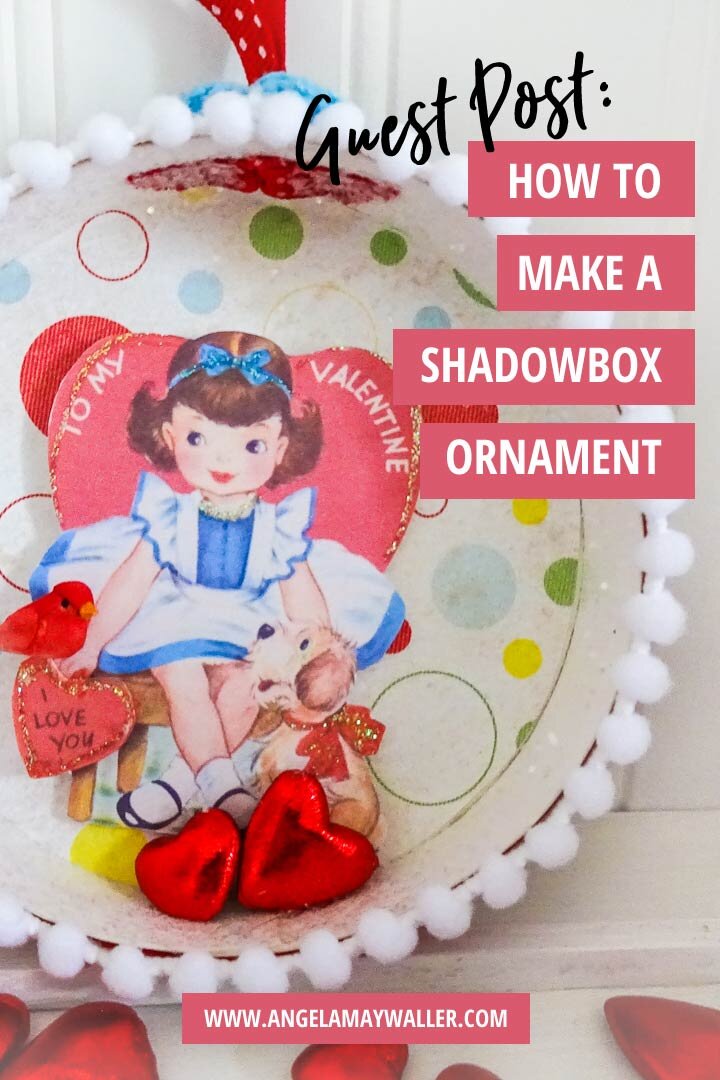
I’ve sure enjoyed sharing this with you, I hope you give it a try. If you make an ornament, be sure to share on Instagram and tag me @brookhollowlane
Thank you SO MUCH for sharing that with us, Leslie!!! It’s been an honor to have you and I can’t wait to try this fun craft. If you try it, leave a comment below or come on over to Facebook or Instagram and share your results. I can’t wait to see what you make!

Leave a Reply